running k3s on fedora coreos bare metal
This post explains how to install K3s on Fedora CoreOS. K3s is a lightweight Kubernetes distribution and Fedora CoreOS is an image-based Linux distribution for containerized workloads.
With Fedora CoreOS, you get a bulletproof, minimal host system with atomic updates. Installing K3s allows you to deploy applications using standard Kubernetes tools like kubectl and helm.
Honestly, why wouldn’t you use production-grade container orchestration to self-host an RSS reader or whatever?
Table of contents
Where we’re going
By the end of this tutorial, we will have created a USB stick to install Fedora CoreOS and K3s on a bare metal machine. Booting from the USB stick transforms any computer into a fully-functional, single-node Kubernetes cluster!
The full configuration (just 140 lines!) is available here: server.bu
Warning: booting from the USB stick will wipe everything on the machine. There isn’t even a confirmation prompt; it just starts installing. Be very careful!
Prerequisites
- Familiarity with Kubernetes and
kubectl. - Basics of installing and configuring Fedora CoreOS.
- You should know how to use “butane” and “ignition” files to configure Fedora CoreOS.
- You will need to run
coreos-installer,butane, andignition-validate. - You should be familiar with
rpm-ostree, although we’ll use only a few commands in this tutorial. - If not, please refer to the official Fedora CoreOS “Getting Started” guide.
- You will need a USB stick and a computer to use as a server1
- The computer should be connected to the internet via Ethernet.
- Take backups of anything you want to save before booting from the USB stick!
Create the ISO
First, install the necessary programs. If you use Fedora Workstation or Server, you can install these with dnf:
sudo dnf install coreos-installer butane ignition-validate
We’ll use the following script to create a Fedora CoreOS ISO configured from a butane file.
#!/usr/bin/sh

set -e

[ $# -ne 2 ] && { echo "Usage: $0 BUTANE INSTALL_DISK"; exit 1; }

INPUT_BUTANE=$1
INSTALL_DISK=$2
OUTPUT_IGNITION="${INPUT_BUTANE%.bu}.ign"
OUTPUT_ISO=server.iso

echo "Generating ignition"
butane --pretty --strict "$INPUT_BUTANE" --output "$OUTPUT_IGNITION"
ignition-validate server.ign

if [ ! -f fedora-coreos.iso ]; then
    echo "Downloading Fedora coreos"
    FCOS_ISO=$(coreos-installer download -f iso --decompress)
    mv "$FCOS_ISO" fedora-coreos.iso
fi

if [ -f "$OUTPUT_ISO" ]; then
    rm "$OUTPUT_ISO"
fi

echo "Embedding ignition"
coreos-installer iso customize \
    --dest-ignition "$OUTPUT_IGNITION" \
    --dest-device "$INSTALL_DISK" \
    -o "$OUTPUT_ISO" \
    fedora-coreos.iso

echo "Created $OUTPUT_ISO"
The script uses coreos-installer iso customize to create an ISO that will automatically install and configure Fedora CoreOS on the target disk using the Butane file you provide. Save the script as create-iso.sh and run chmod +x create-iso.sh to make it executable.
Now create a butane file server.bu that adds a user with sudo permissions and ssh access:
# server.bu
variant: fcos
version: 1.4.0
passwd:
  users:
    - name: <your username>
      groups: ["wheel", "sudo"]
      ssh_authorized_keys:
        - <your SSH public key>
Then create the ISO by running the script, configuring it to install on a particular disk (here we’re using /dev/sda):
./create-iso.sh server.bu /dev/sda
If all goes well you should see output like this:
Generating ignition
Downloading Fedora coreos
Downloading Fedora CoreOS stable x86_64 metal image (iso) and signature
> Read disk 778.0 MiB/778.0 MiB (100%)
gpg: Signature made Mon 01 May 2023 04:19:33 PM PDT
gpg:                using RSA key 6A51BBABBA3D5467B6171221809A8D7CEB10B464
gpg: checking the trustdb
gpg: marginals needed: 3  completes needed: 1  trust model: pgp
gpg: depth: 0  valid:   4  signed:   0  trust: 0-, 0q, 0n, 0m, 0f, 4u
gpg: Good signature from "Fedora (38) <fedora-38-primary@fedoraproject.org>" [ultimate]
Embedding ignition
Boot media will automatically install to /dev/sda without confirmation.
Created server.iso
You should now see a file called server.iso in the current working directory.
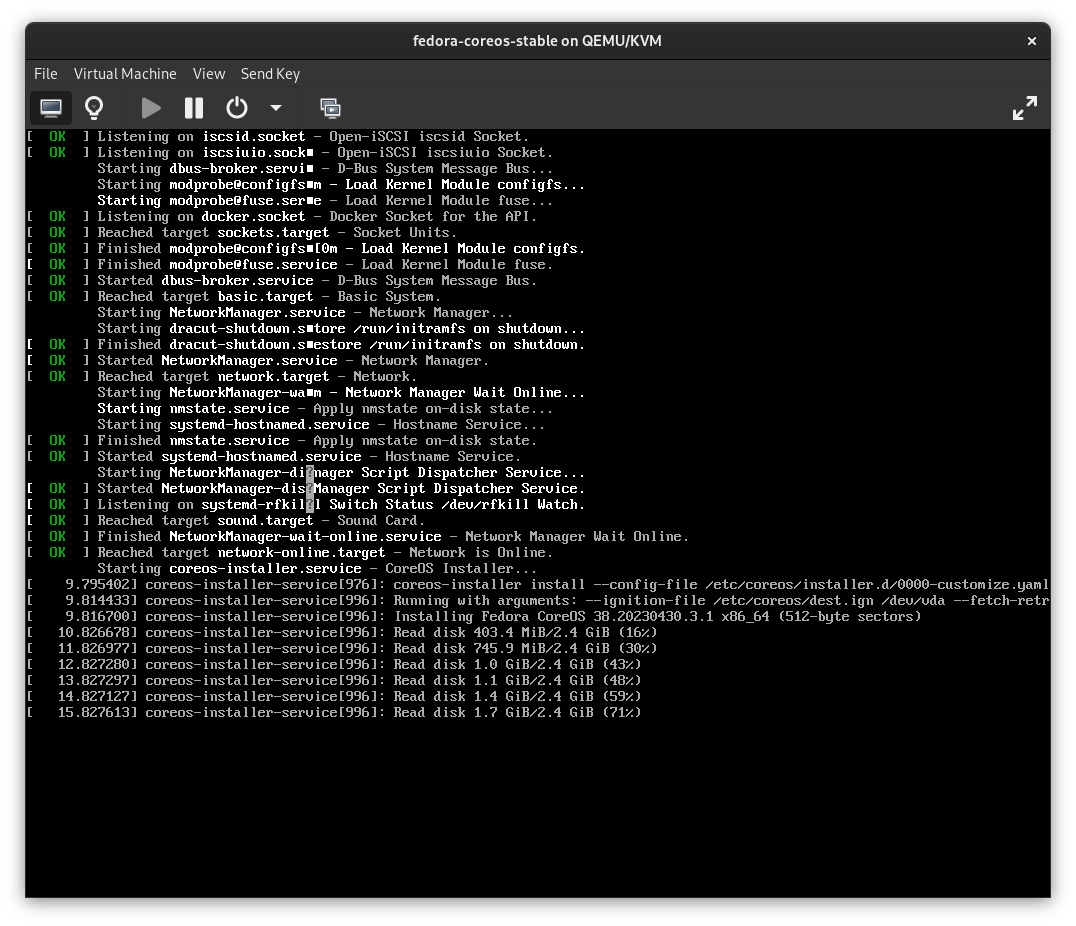
Testing in a VM
It’s possible to boot the ISO in a VM to test the installation. For example, you can use virt-manager:
- Run
./create-iso server.bu /dev/vdato create the ISO (the target disk is/dev/vda). - Copy the ISO to
/var/lib/libvirt/images/ - Create a new virtual machine in the virt-manager UI based on that ISO.
You should see Fedora CoreOS being installed:
After installation finishes, the login screen will show the IP address associated with the VM. You can ssh to that IP using the ssh username and key you configured in the ignition file.
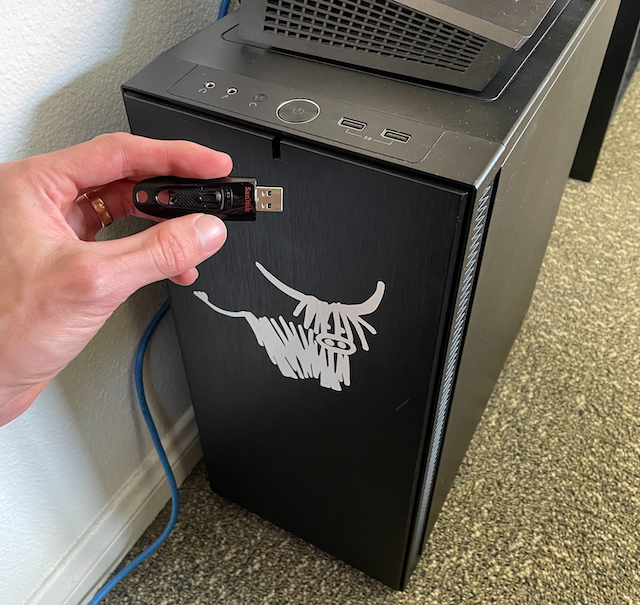
Install on bare metal from USB
Warning: the install process will delete everything on the machine. Once you start booting, it will not prompt for confirmation, so backup anything you want to save before plugging in the USB stick.
First, burn the ISO to a USB stick. Then plug it into the computer and boot from the USB. (This usually requires entering the BIOS and fiddling with boot order. Specific steps vary based on the BIOS you have installed.)
That’s it! On boot, Fedora CoreOS will automatically be installed on the target disk. You can verify the installation by ssh’ing to the IP address of the server.
Install K3s
Now let’s update the server.bu file to install and run K3s. The following steps are adapted from the official K3s install script.
First, we will configure two yum repositories so we can install some dependencies.
storage:
  files:
    - path: /etc/yum.repos.d/kubernetes.repo
      mode: 0644
      contents:
        inline: |
          [kubernetes]
          name=Kubernetes
          baseurl=https://pkgs.k8s.io/core:/stable:/v1.27/rpm/
          enabled=1
          gpgcheck=1
          gpgkey=https://pkgs.k8s.io/core:/stable:/v1.27/rpm/repodata/repomd.xml.key
    - path: /etc/yum.repos.d/rancher-k3s-common.repo
      mode: 0644
      contents:
        inline: |
          [rancher-k3s-common-stable]
          name=Rancher K3s Common (stable)
          baseurl=https://rpm.rancher.io/k3s/stable/common/centos/8/noarch
          enabled=1
          gpgcheck=1
          repo_gpgcheck=0
          gpgkey=https://rpm.rancher.io/public.key
The kubernetes repository lets us install kubectl, and the rancher-k3s-common repository lets us install k3s-selinux to configure SELinux policies for K3s.
Now we can add a systemd unit to install the dependencies using rpm-ostree:
systemd:
  units:
    - name: "rpm-ostree-install-k3s-dependencies.service"
      enabled: true
      contents: |
        [Unit]
        Description=Install k3s dependencies
        Wants=network-online.target
        After=network-online.target
        Before=zincati.service
        ConditionPathExists=|!/usr/bin/kubectl
        ConditionPathExists=|!/usr/share/selinux/packages/k3s.pp

        [Service]
        Type=oneshot
        RemainAfterExit=yes
        ExecStart=rpm-ostree install --apply-live --allow-inactive --assumeyes kubectl k3s-selinux

        [Install]
        WantedBy=multi-user.target
Next, we need to install the k3s binary itself. Unfortunately, the K3s project does not provide an RPM package we can install, so instead we download the binary from GitHub releases. We include a verification hash (copied from the first line in the “sha256sum-amd64.txt” file included in each release) to ensure the file hasn’t been tampered with.
storage:
  files:
    - path: /usr/local/bin/k3s
      overwrite: true
      mode: 0755
      contents:
        source: "https://github.com/k3s-io/k3s/releases/download/v1.27.10%2Bk3s2/k3s"
        verification:
          hash: "sha256-b43f518dc7c247bd40f2ff5dcbd5050e31b3345a55673daf9238ac28965f0867"
Finally, configure a systemd service to run k3s:
systemd:
  units:
    - name: "k3s.service"
      enabled: true
      contents: |
        [Unit]
        Description=Run K3s
        Wants=network-online.target
        After=network-online.target

        [Service]
        Type=notify
        EnvironmentFile=-/etc/default/%N
        EnvironmentFile=-/etc/sysconfig/%N
        EnvironmentFile=-/etc/systemd/system/%N.env
        KillMode=process
        Delegate=yes
        LimitNOFILE=1048576
        LimitNPROC=infinity
        LimitCORE=infinity
        TasksMax=infinity
        TimeoutStartSec=0
        Restart=always
        RestartSec=5s
        ExecStartPre=-/sbin/modprobe br_netfilter
        ExecStartPre=-/sbin/modprobe overlay
        ExecStart=/usr/local/bin/k3s server

        [Install]
        WantedBy=multi-user.target
You can customize the arguments passed to k3s server in the systemd unit. Available options are described in the K3s docs.
Connect to the server with kubectl
After ssh’ing into the server, we can use kubectl to access the Kubernetes control plane.
sudo suto switch to the root user.export KUBECONFIG=/etc/rancher/k3s/k3s.yamlto tell kubectl the location of the kubeconfig file.
If it’s working, kubectl get nodes should show something like this:
[root@localhost]# kubectl get nodes
NAME                    STATUS   ROLES                  AGE   VERSION
localhost.localdomain   Ready    control-plane,master   11m   v1.27.10+k3s2
To use kubectl from a different machine, copy /etc/rancher/k3s/k3s.yaml from the server to ~/.kube/config on your machine. You will need to replace “127.0.0.1” in the kubeconfig file with the IP address or hostname of the server.
Configure graceful node shutdown
On shutdown, systemd will stop the k3s service and eventually kill the processes for each pod’s containers. This can sometimes cause problems if the system is left in an inconsistent state.
We can avoid such problems by configuring K3s to use graceful node shutdown. With this configuration, systemd will notify Kubernetes before the system shuts down so Kubernetes can terminate pods gracefully.
First, update the k3s server command in the k3s.service unit with a config file for kubelet:
# in the ExecStart section of "k3s.service"
/usr/local/bin/k3s server --kubelet-arg="config=/etc/rancher/k3s/kubelet.config"
Then create a kubelet.config file by adding this section to server.bu:
storage:
  files:
    - path: /etc/rancher/k3s/kubelet.config
      mode: 0644
      contents:
        inline: |
          apiVersion: kubelet.config.k8s.io/v1beta1
          kind: KubeletConfiguration
          shutdownGracePeriod: 60s
          shutdownGracePeriodCriticalPods: 10s
With graceful shutdown enabled, pods will be terminated with status.phase=Failed and status.reason=Shutdown. It’s annoying to see failed pods after a restart, so we also configure a systemd unit to automatically clean them up:
systemd:
  units:
    # Node shutdown leaves pods with status.phase=Failed and status.reason=Shutdown,
    # so delete them automatically on startup.
    # This may delete some pods that failed for other reasons, but --field-selector doesn't
    # currently support status.reason, so it's the best we can do.
    - name: "k3s-cleanup-shutdown-pods.service"
      enabled: true
      contents: |
        [Unit]
        Description=Cleanup pods terminated by node shutdown
        Wants=k3s.service

        [Service]
        Type=oneshot
        Environment=KUBECONFIG=/etc/rancher/k3s/k3s.yaml
        ExecStart=kubectl delete pods --field-selector status.phase=Failed -A --ignore-not-found=true
        Restart=on-failure
        RestartSec=30

        [Install]
        WantedBy=multi-user.target
Reinstall without losing data
Since we installed K3s as a static binary, updates from rpm-ostree will not upgrade K3s. I tend to prefer this, since upgrading Kubernetes versions can sometimes require changes to application manifests (for example, removing references to deprecated APIs), and I like to test these in advance.
But how do we upgrade K3s then? By creating a new ISO and re-installing the system!
By default, however, re-installing from the ISO would delete all data on the machine, including the Kubernetes etcd database and any persistent volumes. Ideally, we’d want to upgrade K3s while preserving application data.
Fortunately, Fedora CoreOS separates the immutable data of the system image from mutable data owned by applications (configuration, databases, etc.). All of the application data we want to preserve is in /var. We can configure Fedora CoreOS to keep /var on reinstall:
storage:
  disks:
    - device: /dev/disk/by-id/coreos-boot-disk
      wipe_table: false
      partitions:
      - number: 4
        label: root
        size_mib: 8192
        resize: true
      - label: var  # not specifying "number", so this will go after the root partition
        size_mib: 0 # means "use the rest of the space on the disk"
  filesystems:
    - path: /var
      device: /dev/disk/by-partlabel/var
      format: xfs
      wipe_filesystem: false # preserve /var on reinstall (this is the default, but be explicit)
      with_mount_unit: true  # mount this filesystem in the real root
What about the k3s binary we installed in /usr/local/bin? It turns out that Fedora CoreOS maps /usr/local to a subvolume in /var. On reinstall, the previously-installed k3s binary will already exist. That’s why earlier in server.bu we set overwrite: true for the k3s binary – this tells ignition to replace the old k3s binary with the new version on reinstall!
Conclusion
In this tutorial, we’ve just scratched the surface of what’s possible with Fedora CoreOS and K3s. Beyond this, you can:
- Use netboot to provision machines instead of
coreos-installer iso customize - Configure an automatic updates strategy.
- Configure an ad-blocking DNS server using
dnsmasq. - Configure a VPN using
wireguard. - Add more nodes to the Kubernetes cluster using the
k3s agentcommand. - Create a highly available Kubernetes control plane.
The nice thing about K3s on Fedora CoreOS is that once you get it set up, you can deploy stuff using kubectl or helm like you would in any other Kubernetes cluster. I’ve been using this for my home server for several months now, and so far it’s been rock solid!
I believe it’s possible to install Fedora CoreOS on a Raspberry Pi, but I haven’t tried it and the documentation says there are some additional steps. ↩︎